How to scan with a Canon printer

Do you have a Canon printer with a scanner and some old photos you want to digitalise? Have you been asked to scan an important document and you're not sure how to go about it? Well, congratulations — you're in the right place because we're here to make life a little easier for you! Pay attention because we're going to tell you how to scan on a Canon printer, step by step.
Position the document you wish to scan
Of course, you must connect the printer to your computer beforehand. The vast majority can be connected wirelessly via a touchscreen panel, but you may also need to connect it via a USB cable. Once connected, check that it is switched on and place the items to be scanned face-down on the platen (the glass plate) of the printer. Remember that for it to scan correctly, you must specify the size of your document. For text documents, do this by aligning the top corner of your document with the corner of the platen where the arrow is (this is known as the alignment mark).
- When scanning a single item such as a photo, postcard, business card or DVD/BD/CD, place it face down on the platen, leaving at least 1 cm (0.39 inches) between the edges of the plate (diagonally striped area) and the item itself. Remember that parts in the area with diagonal stripes will not be scanned. Also note that you may save large items (such as A4 size photos) which cannot be positioned away from the edges/arrow (alignment mark) of the platen as PDF files.
- f you want to scan several photos, postcards or cards at the same time, position them so there is at least 1 cm (0.39 inches) between the edges of the platen (diagonal striped area) and the items. Also ensure that there is the same amount of space between each one of the items. Portions placed on the area with diagonal stripes will not be scanned. Slanted items (10 degrees or less) will be corrected automatically.
- However, to scan magazines, newspapers or other documents, place the item face down on the plate and align one of its top corners with the corner of the plate where the arrow (alignment mark) is located.
Start IJ Scan Utility
In Windows, click the Start button and open the Canon Utilities folder. On Mac, click 'Go' in the top menu bar, then 'Applications', open the Canon Utilities folder, and then, the IJ Utility folder.
Select scanning settings
Once IJ Scan Utility is launched, click on 'Settings' (in the bottom right corner of the application) and then on 'Scan Document'. Here, you can select the type of document you want to scan, the size, resolution, and the location where you want to save the scanned document. Some printers can be configured to automatically scan both sides of a document. If this option is available and you wish to activate it, select 'Document (ADF/Platen)' from the drop-down menu next to 'Select source'.
Scan by clicking on 'Auto'
Whether you click on 'Auto' (automatic scanning), 'Document' (if you are scanning a document and saving it as a PDF), or 'Photo' (if it is a photograph), the scanning process will start immediately.
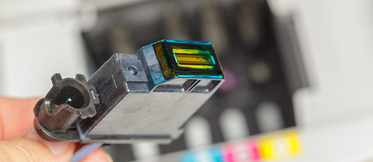
Do you need consumables for your printer? Find a wide variety of Canon ink cartridges and toners on Webcartridge.