How to sublimate a mug

Using dye-sublimation on mugs is all the rage! As a souvenir to commemorate a trip; featuring an inspirational quote, a joke, or a photo of your beloved pet. It's the perfect gift and, what's more, you can make it at home and customise it as you wish. The first thing you need to know is that dye-sublimation is a pretty simple digital printing technique that can be used to decorate a variety of objects. You can indeed use this technique to print a photo on a piece like a mug, but it can also be used on a garment, a mobile phone case or a bag. But why are we focusing on mugs here? Well, because the mug is the personalisable product par excellence! We remind you that in Webcartridge you can buy mugs to sublimate.
What do you need to sublimate mugs?
Grab a pen and paper and note down what you need to sublimate a mug: a dye sublimation printer (this must be an inkjet printer); dye sublimation ink (only use this type of ink in your sublimation printer — normal ink won’t work!), sublimation paper; thermal adhesive tape, and a heat press for mugs. Now, let us explain the process in more detail.
Sublimation printer
The first thing you need to bear in mind is that you must use an inkjet printer and that it must be used exclusively for dye-sublimation printing. In other words, if the printer you're going to use for sublimation is used with normal ink, it'll no longer be suitable for sublimation. On the other hand, since we're talking about sublimating mugs, which means that the printing area is small, an A4 printer will do.
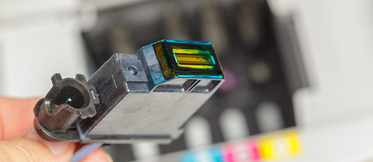
Sublimation ink
These are special inks for sublimation that react when heated. They turn into a gas and penetrate the surface of the product you are sublimating. This is the reason why normal ink is not suitable for mug sublimation printing or any other kind of sublimation printing.
Sublimation paper
The sublimation paper acts to transfer the ink from the printer to the mug. Good paper should maximise definition and enable maximum ink transfer. There are different brands available; however, it doesn’t matter if you’re sublimating mugs, fabrics, porcelain, etc — the type of sublimation paper you use is always the same.
Thermal tape
Thermal tape is used to keep the printed sublimation paper in place on the mug and to withstand the temperature of the heat press.
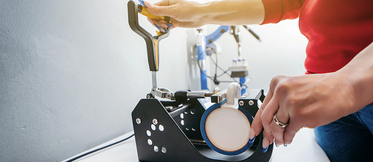
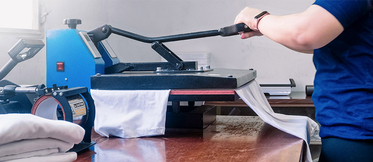
Heat press for mugs
There are different types of heat presses for mugs. Just choose the one that best suits your needs in terms of price, features and size.
How to sublimate mugs step by step
- Choose a design and choose a mug. Remember that although you are not limited in terms of the design, you are limited in terms of the mug because not all of them are suitable. The mug must be sublimation-ready, and have a high-quality, uniform finish for optimal and long-lasting results. Preferably, it should be preferably white, which ensures that the colour of the design doesn't blend in with the colour of the mug.
- Now print your chosen image using sublimation ink and onto sublimation paper with your sublimation printer.
- Have you got it? Now cut out the image so that it can be fixed to the mug with the heat tape.
- Place the mug on the plate, set it appropriately, and leave it for the amount of time given in the instructions.
- Ready! Wait for it to cool down (or cool it under the tap if the mug is made of ceramic and not glass), and then you can pour your tea or coffee into it!
Tips for successful mug sublimation
- Make sure that the image you choose is clear and bear in mind the dimensions of the mug.
- As we've already mentioned, not just any mug will do. Always use a mug that has been designed for sublimation, is uniformly white in colour, and has no cracks or imperfections.
- Please note that when you print the image on the sublimation paper, it will not look as colourful as the original image. Don't worry. It will show the correct colour once the design has been applied and the mug has been heat pressed.
- The most important step in the process is when the image is fixed to the mug using the thermal tape. Care must be taken to ensure that it is in the right place and has no creases. If the paper is not stuck firmly enough, you won't get satisfactory results.
- The mug should only be placed on the plate when it has warmed up. Remember, too, that if you are working in a very cold or damp environment, the iron will need a little more time to heat up.
- When you've finished, don't cool the mug using cold water unless it's made of ceramic; if it's made of glass, it may shatter.
If you need more information, you can read our sublimation guide.